Sunday, February 17, 2013

No see um's sound nasty!

I have read and heard a lot about these nasty little no see um's (also known as punkies and biting midges). They come out at night and early morning in the tropics and literally bite a chunk of flesh out of your skin to get at your blood. The bites are irritating, painful, and can cause long-lasting painful lesions for some people. You will feel that something is biting, but the person suffering can not see what it is. That sounds mighty painful and I can imagine right now that I would be up all night trying to figure out a way to get rid of them.

So, I have decided to be a little proactive on the bug front. I am making screens for our hatch and companionway door out of the screen farbric that are no smaller than a 16-mesh. We are using a thin board cut out the shape of the companionway and gluing the fabric in between. Then I will paint the board white to match. We are putting on a hinge on both sides in the middle so that it can fold in half and be stored under our bunk when not in use. I hope that our plan here works. The only problem that we see is that the board material that we used won't be strong enough.

We have also heard that the Avon lotion "Skin so soft" works well at deterring them. I happened to find a bottle of this in my bathroom drawer that has been there forever. Never liked the stuff until now. If it works I will love the stuff.


Cheers, Shawnae

Sunday, January 20, 2013

New Boat Cook Stove

One of the other things we're changing on the boat  is the stove.  Stove = eating = happy tummy = happy Captain!!!

So, in other words, I'm highly motivated to make mealtime as easy and functional as possible.    We do have a propane grill mounted on the starboard rail that we use a lot already.  But we need a good way to cook below-decks too.   This past summer on Flathead Lake, we used a little portable camping stove.  Works great, but difficult to unstow it, hook up the 1lb propane bottle, keep the pans from sliding around the top, then take it apart when done, etc.   Functional, but surely not convenient.

New Girl has (had) a pressurized Princess Stove fueled by alcohol.  For those of you who've used one of these. . . . well, let's just say it's way exciting and way more frustrating than it should be.   SOME (strange) people I know actually like these things (pressurized alcohol stove), but I surely do NOT!

The forum on Sailnet has been extremely helpful to me - lots of great advice that's practical and freely given. 

After much research, I decided to install a non-pressurized alcohol stove.   This has all of the safety advantages that alcohol has over propane, is much easier to hook up and install, and cooks "almost" as fast as propane.

The difficulty with propane is that it is heavier than air.  So any leaks (or even an unlit burner) and the propane fills up the boat.  The heavy explosive vapor can't escape out of the bottom of the boat because it's, obviously, water tight.  It just continues to fill up until you are asphyxiated or a stray spark (usually from something electronic) causes an explosion.   In order for propane to be used safely on a boat, it requires an outside locker for the propane tank that is vented out the bottom of the locker to the atmosphere and electric solenoids to shut off the fuel line when not used.  A good system, but quite complicated.  I am a big believe in keeping things simple (if possible).

Well . . .  here we go on eBay and Craigslist to find a non-pressurized alcohol stove.  Bingo!  Got it.   It is a two burner Origo stove and appears to be barely used.   Excellent deal.

And, the best news yet is that the old Princess stove is easily removed from the stainless steel enclosure on board . . . AND the new stove fits almost exactly in the same spot.   It also still allows us to use the same adjustable pot holders as well.  These are a very handy feature when cooking in a rolly anchorage or when underway.

This was ONE project that actually went better, cost less, and was quicker than anticipated.  

Oh . . .  and we sold the old (hated) pressurized Princess stove on eBay for 1/3 of what the Origo cost.   Super cool!!!!

Cap'n Mark

Thiswas the old pressurized Princess stove


Origo Stove top


These are the canisters that hold the denatured alcohol.

Stove enclosure - sliding cuttingboard top

Tuesday, January 1, 2013

DIY Halyard Bag

So after changing all of the items in our post "No more bonking the noggin" I have used the same items that I used for the fender bag to make a halyard bag for all 3 of our lines that lead aft. This will keep the chaos in order so we don't get all tied up. This bag was $55 with Sailrite so I created my own for under $10. We will use the twist fasteners to hang it on the outside of the cabin wall in the cockpit.

Sunday, December 30, 2012

DIY Fender Bags

With our trip to the Bahamas in the near future, nearer than I can believe, I am thinking about all of the items we are going to have to store in such a small little space. With this comes careful organization. I do kind of get obsessed with this and it could eat me alive. But to be able to make it through 2 months in a 27' space I am planning ahead. Where does everyone put their fenders? There are four of them and they get wet and messy. During the summer on the lake once we left the dock they either went into the seats in the cockpit or in the cabin on the quarter berth. We are going to be using those seats for other storage and the quarter berth will now be my bed. That means no wet and dirty fenders allowed. I have searched on the internet for pictures and post of what other cruisers are doing with this issue. I have seen single and double fender bags and heard pros and cons. The pros won out and I devised a plan for ours.

I went shopping for cargo netting and white webbing at JoAnns fabrics and Wal Mart and then used the Captain Navy color sunbrella for the backing. I had no pattern to go from, just the picture in my head. I did use the actual fenders, laying them on the fabric and guess work. I got it all finished. I can't wait to try it out.


DIY Genoa Bag

I had started this entry back in July and I thought that I had completed and posted it already. I found it in the drafts. Oh how time does get away from me. I will continue it now but I just thought that I would metion that this project was completed in July and added to the boat then. It has been tested, tried and true. We love it!!

We have problem with storage in the boat. There is no room. This is not a new story. So storage of a big bulky sail on the foredeck is a fantastic idea. We found a jib bag kit on Sailrite that will be perfect for us to use. We purchased the kit and it came in the mail shortly thereafter. It has all of the sunbrella material in color Captain Navy with the pattern drawn on the fabric. It also includes the thread, zipper webbing and an instructional video that you can watch along the way of your sewing process. It was pretty easy to put together. Though I have only had one home-ec sewing class in like the 7th grade when I lived in New Orleans, LA and I can't say that I was at the top of the class. I have only really done crafting projects since and never any clothing from a pattern. So this was a brave project and Mark had no doubt that I could do it. Maybe he just thinks this is a girl thing and we are all born with the ability and know how to run a Singer. Ha! I did have Mark help me out also by having him cut the fabric out with the hot knife.

It all worked out well and here is the finished project.


Sunday, December 2, 2012

No more bonking the noggin.


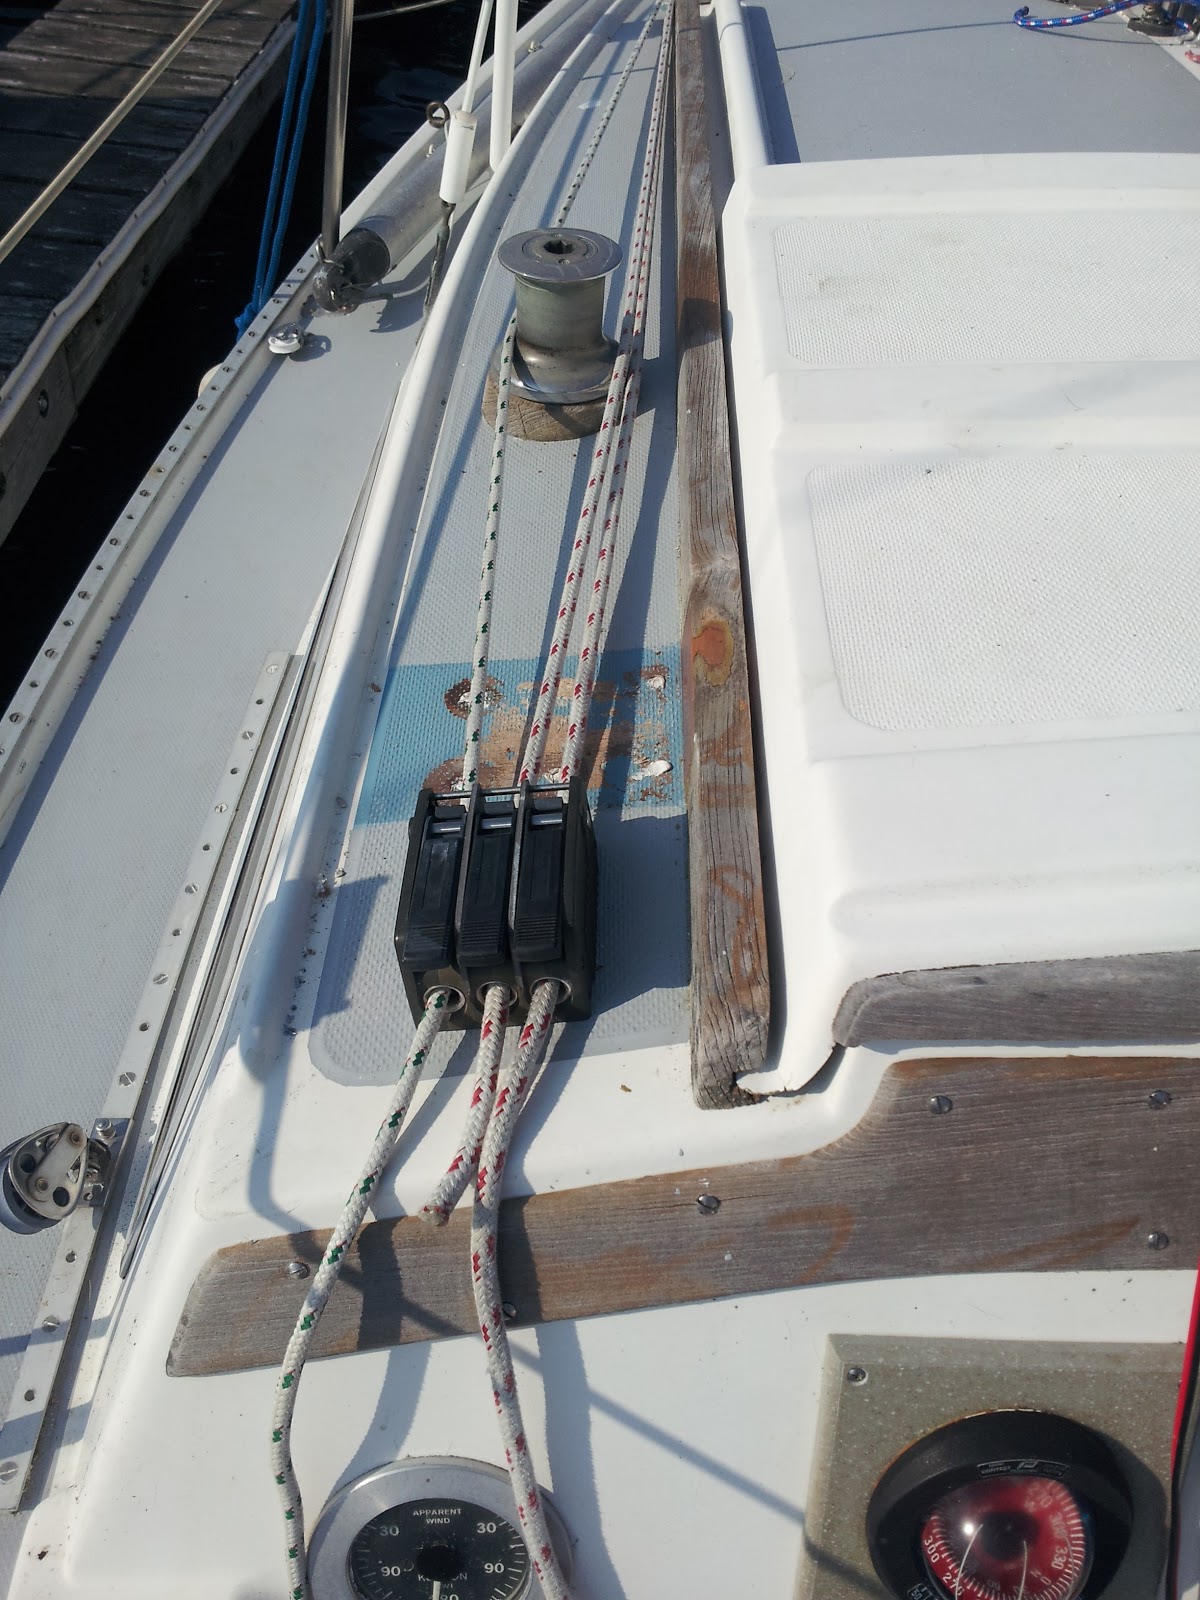
Right over the coach roof we have an arch that has about 5 cam cleats that hold the halyards. Oh it is so ugly and right in the way.  Mark is 6'4" and maneuvering around the boat is a challenge. So we brain stormed on how we could get rid of that. We ended up purchasing off of EBay a 3 line clutch and an organizer.  I removed the arch, see ya, and we installed the clutch and the organizer along side the coach roof. That sure did clean it up nicely and it is much easier to go below. What a great improvement.

Anchors away!


When we bought the boat it had a great anchor but it was located in the back of the boat in a bucket in one of the cockpit benches. It obviously had never been used. Mark had a hard time lifting it in and out, over the rail, and twisting and turning his body to make it work. He ended up wrenching his back. There has got to be a better way. So he looked around and found a hanger to go at the bow pulpit. Scary as it was, he cut a hole in the boat and installed a deck pipe for the chain to go into a locker in the v-berth below. Oh boy that works great. What a wonderful improvement. It sure makes it nicer when we decide to anchor for a swim and lunch.